Dividing Up the Farm for Grazing Management
The first step to any grazing management, fertiliser or pasture improvement strategy is to identify which pastures, soils, land classes and aspects exist on the farm. These can then be categorised into groups, which are managed differently, produce differently and suit different purposes. To achieve this, a farm map is needed, either in hard copy or electronic form.
A farm map can also be used to help you to accurately measure your existing paddock sizes, land classes, pasture types and condition, and for developing grazing management plans, feed budgets, fertiliser and pasture establishment budgets, planning subdivision and measuring new fencing.
Once completed, your farm map can be used as a tool for applying the EverGraze principles for development and/or implementation of management plans to address profitability, natural resource management and risk management issues on farm.
Agriculture Victoria offers training for development of farm maps through the FarmPlan 21 program and the EverGraze Dividing up the Farm for Grazing Management program. In NSW contact your local CMA or local Land Services staff for training options.
Some questions you should ask when putting together areas for management:
- What is the best use for this area?
- Does this area currently serve a particular purpose for my enterprise?
- How do I need to manage the soil or pasture in this area?
- Does this area have a particular limiting factor that needs to be managed, such as steep slope or waterlogging?
- Does this area have a seasonal variation in production?
- Should this area be fenced differently to improve its management?
- Should this area be sown to a different pasture species to achieve my production and environmental aims?
Some considerations
What is the capability of the land – ability to handle cultivation, drilling or grazing stock?
| Landclass | Description |
| 1 | Deep, highly workable soils, suitable for growing vegetables |
| 2 | Usually flat landscapes that can be cropped each year without damaging the soil structure |
| 3 | Flat or undulating landscapes which can be cropped occasionally and are suitable for sowing pastures |
| 4 | Undulating landscapes suited to sowing perennial pastures and rotationally grazing with stock |
| 5 | Hill country or rocky areas not suited to sowing pastures other than aerial sowing, but can be grazed year-round by stock |
| 6 | Hill country, high erosion risk, aerial seeding only, suited to grazing through the growing season but destock during summer |
| 7 | Areas suited only to occasional grazing |
| 8 | Areas not suited to grazing |
What is the aspect?
[expand title=” ” swaptitle=” ” tag=”h4″ elwraptag=”div” elwrapclass=”expend-collapse-wrapper”]
In hill country, aspect affects the relative seasonal productivity, pasture utilisation, pasture species and suitability for different classes of stock throughout the year.
Southerly aspects are characterised by:
- Less hours of direct sunlight.
- Lower winter growth rates.
- Reduced grazing due to colder weather and (anecdotally) less sweet grass.
- Low pasture utilisation, which causes rank pasture and low clover component.
- Higher proportion of perennials and if a native pasture, it is more likely to include Microlaena.
- An ability to maintain green feed later in the season and ground cover over summer.
- The annual component is usually annual grasses such as silver grass.
- Poor suitability to lambing during winter due to cold conditions.
Northerly aspects are characterised by:
- Higher winter growth rates and feed quality.
- Higher annual component including clover and capeweed.
- Lower ground cover making it less tolerant to summer/autumn grazing.
- Native pastures usually have a high proportion of wallaby grass.
- Less likely to tolerate high soil fertility (on native pastures).

What is the soil type fertility, depth, drainage and plant available water?
[expand title=” ” swaptitle=” ” tag=”h4″ elwraptag=”div” elwrapclass=”expend-collapse-wrapper”]
Soils can be classified in terms of their fertility, texture, colour and depth in each horizon. The soil type will affect factors such as water holding capacity, drainage, potential pasture species, potential production, soil fertility requirements and specific management requirements. Drainage and plant available water will also be affected by topography. This can have significant effects on existing vegetation as well as potentially suitable pastures. The examples from EverGraze Proof Sites presented below (Figures 2-5) show how land can be classified in different areas for pasture species and variety selection and management.


Are there differences in soil fertility?
[expand title=” ” swaptitle=” ” tag=”h4″ elwraptag=”div” elwrapclass=”expend-collapse-wrapper”]
It’s useful to consider soil fertility when classifying land. Differences in soil fertility provide a good indication of potential stock carrying capacity as well as fertiliser requirements. Take soil tests for representative paddocks of each land class and monitor these over time.
[/expand]
What existing pasture species, condition and productivity level?
[expand title=” ” swaptitle=” ” tag=”h4″ elwraptag=”div” elwrapclass=”expend-collapse-wrapper”]
Different pasture species have different management requirements and purposes in the farming system. Following are examples of pasture species that may be grouped differently across the farm.
- Summer active perennial herb or legume (eg. chicory or lucerne)
- Summer active perennial grass (eg. kikuyu)
- Winter active/summer dormant perennial grass (eg. phalaris, perennial ryegrass, tall fescue)
- Unimproved native pasture mostly native species (native species make up > 50% of pasture composition)
- Unimproved native pasture mostly annual species (native species make up < 50% of pasture composition)
- Sown annual pasture (eg. Annual ryegrass)
- Crop
Pasture condition, composition and relative seasonal productivity should be considered when planning feed budgets or a pasture renovation program.
[/expand]
Have you got access between paddocks and to water?
[expand title=” ” swaptitle=” ” tag=”h4″ elwraptag=”div” elwrapclass=”expend-collapse-wrapper”]
Consider which paddocks work well together in a rotational grazing system. When planning new fences, consider how the stock will move between paddocks and ensure ready access to water.
[/expand]
What environmental issues need to be addressed?
[expand title=” ” swaptitle=” ” tag=”h4″ elwraptag=”div” elwrapclass=”expend-collapse-wrapper”]
Consider the different environmental issues that need to be addressed on the classes you have identified. Examples might include soil erosion, salinity, biodiversity, soil acidity or specific weeds. See your regional package for a description of environmental issues in your area and strategies to address these.
[/expand]
Setting objectives and putting it all together
[expand title=” ” swaptitle=” ” tag=”h4″ elwraptag=”div” elwrapclass=”expend-collapse-wrapper”]
The EverGraze Whole Farm Grazing Strategies course focuses on identifying objectives for land use, productivity, environment, lifestyle, profit, and risk. In the course, an integrated grazing management plan is developed for implementation on your farm to achieve your objectives.
Further information on setting management objectives can be found in the “Making Strategic Decisions on Farm” EverGraze Exchange.
[/expand]
Examples of farm maps
The examples below display how farm mapping can be used to divide the farm for grazing management and allocate livestock appropriately. A template for you to identify your pastures, landclasses and appropriate management strategies can be downloaded here.
Woomargama Station
[expand title=” ” swaptitle=” ” tag=”h4″ elwraptag=”div” elwrapclass=”expend-collapse-wrapper”]
Chris Mirams, previously manager of Woomargama Station near Holbrook NSW, identifies land classes according to their soil fertility, drainage, slope, pastures and carrying capacity (Figure 6). Stock are then allocated to combinations of these land classes to meet their needs throughout the seasons (Figure 7). At Woomargama, Chris grazed cattle predominately on low fertility native pastures for maintenance, with high productivity phalaris playing a role to meet condition targets prior to joining. Ewes and lambs were grazed mostly on high quality phalaris pastures and fertilised native pastures (including sub clover) to meet reproductive targets throughout the year. Wethers were maintained predominately on low fertility native pastures with some phalaris to ensure native pastures were rested at appropriate times, and that there was no break in the wool when feed was limiting. High quality phalaris, sown annuals and lucerne pastures are used for finishing weaner cattle and sheep throughout the year. See Chris Miram’s case study for further information on how Chris divides the farm for grazing management.


Eagle Ridge
[expand title=” ” swaptitle=” ” tag=”h4″ elwraptag=”div” elwrapclass=”expend-collapse-wrapper”]
At Eagle Ridge near Bonnie Doon, Tony Sargeant identifies land classes in a similar fashion (Figure 8). The fragile steep north facing hills are not fertilised and carry wethers at 3 DSE/ha through the growing season. Stock are removed at the end of the season to allow ground cover targets to be met and native pastures to seed. South facing hills are more tolerant of grazing and are fertilised occasionally when funds permit. They are grazed with both ewes and wethers and play a key role in providing autumn feed, allowing the phalaris pastures to be destocked and grow.
Phalaris and unimproved annuals maintain ewes and lambs throughout the year, with some phalaris paddocks having high clover and therefore dedicated to finishing lambs after weaning. Ewes are rotated as one mob until they are set stocked for lambing. They are aggregated into larger mobs at lamb marking, and fully combined again at weaning. It is important that paddocks are fenced to land class to maximise utilisation and enable the above management strategies to be put into place. Paddock sizes provided by the map can be used to develop rotational grazing plans using the EverGraze Feedbase Planning and Budgeting Tool. The details can also be used to develop feed budgets for allocating mobs to paddock groups for rotational grazing and allocating ewes to appropriate paddocks for lambing.


Steps for mapping your farm using iFarm
iFarm is a basic farm mapping program which allows you to map the features of your farm by creating layers over an aerial photo. Typical layers include paddocks and existing fences, proposed fencing, land classes, pasture types, water lines, fertiliser applications, and grazing plans. It can also hold pre-loaded layers including contours and cadastre. In its most basic form, iFarm does not allow you to record stock movements and stocking rates, however more sophisticated programs such as Paddock Action Manager (PAM) will allow for these functions.
Below is a number of steps that can be followed for mapping your farm with iFarm.
Map your farm boundary
- Go into iFarm and click on “Map”
- Turn on the road names, localities, cadastre and watercourse layers to help you to locate your farm.
- Click on the “Farm Boundary” layer (words rather than the tick box) and click “Start”. Click “New” to start drawing your farm boundary. Click on each corner post and double click to finish. If you can’t fit your whole farm on one page, use the zoom out button or just draw in as much as you can and use “edit” to expand the boundary later.
- You can add corner posts to your polygon by right clicking the mouse and selecting “add vertex”. In a similar way, you can delete a corner post by clicking on that post and selecting “delete vertex”.
Draw your paddocks
- Click “stop” to stop editing your farm boundary layer
- Click on the “Farm Boundary” layer (words rather than the tick box) and click “Start”. Click “New” to start drawing your farm boundary. Click on each corner post and double click to finish.
- When you finish drawing a paddock, this box will pop up:
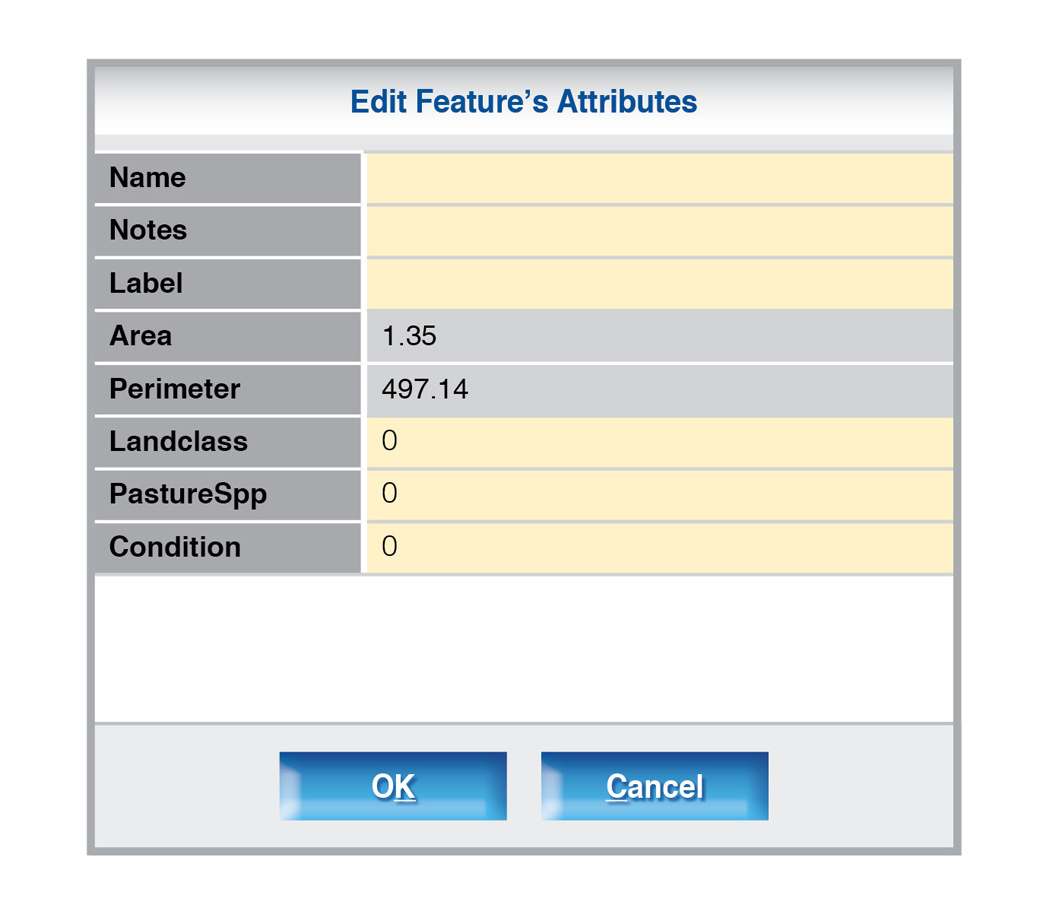
- As a minimum, enter the name of the paddock. You may also like to enter the landclass, existing pasture species, pasture condition and any notes about the paddock in the fields provided. When you create a list of your paddocks in Excel, these fields will appear so that you can measure the total area in each category. A guide for categorising these is provided in Attachment 1. Information you provide here will be used for DPI and EverGraze reporting.
Viewing your pasture paddocks and their features in a list
[expand title=” ” swaptitle=” ” tag=”h4″ elwraptag=”div” elwrapclass=”expend-collapse-wrapper”]
To see your paddocks and their features in a list in Microsoft Excel;
- Right click your mouse in the white area over the list of layers and select “Maintain Layers”
- Find your paddock layer in the list and click on the small arrow in the far left column
- When the list comes up, click on “Export” – the far left blue button underneath the table. The list will be exported to Microsoft Excel. The file will be in the same file as your iFarm map.
Viewing paddock features on the map
- To view the features you have entered into your paddocks (eg. paddock size, name or pasture type), click once on the paddock layer and then click “Properties”.
- Click “Labels” and tick the boxes you want displayed. Click “Ok” to finish.
Create land class, soil type and pasture type layers
- For each pasture type/land class/soil type you manage differently, create a new layer for each category. It is likely you will have more than one paddock in each layer. You do not have to trace around the paddocks individually.
- List your pasture types/soils/land classes in the table below and measure the total area in each category.
- Categories should mean something to you. Examples of your category names might include: Sown annuals class 2, High productivity perennials class 2/3, Low productivity perennials class 3/4, Native north class 6/7, Native south class 5/6, Reserves, Plantations, Housing/Infrastructure. You may prefer to refer to species as your pasture types eg. Phalaris class 3. This can be useful further down the track for inputting into the Feed Demand Calculator.
- Do you have multiple land classes and aspects in single paddocks? Think about how you might fence your paddocks differently to separate paddocks for optimal management and pasture species selection.
- You can change the format of your layer by going to “Properties” and changing the colour/texture/transparency etc.
Other layers you might find useful
- Once you’ve mapped the basic layers, you can now make a number of other layers you might find useful for management. Examples might include “lambing paddocks”, “fertiliser rates” or “seasonal grazing rotations”.
- iFarm can also be used to map reticulation lines and watering troughs. You can learn about these aspects through the DPI Farm Water workshop.
Further Information
- EverGraze Exchange – The Nuts and Bolts of Grazing Management
- EverGraze Exchange – Selecting Pastures for Place and Purpose
- EverGraze Exchange – Making Strategic Decisions
- EverGraze On-Farm Options – Soil and fertility management
- Orange EverGraze research message – Landscape variability can be identified, mapped and managed
- Hamilton EverGraze research message – Right Plant Right Place Right Purpose Right Management
- Wagga Wagga EverGraze research message – Right plant right place and sustainable grazing management leads to persistent pastures
- Albany EverGraze Proof Site Soils
